Visit the global Weldia website.
Switch

What's new in Weldia Designer 2

Weldia Designer 2 has replaced Designer 1 for everyone. This page walks you through the new editor, one place at a time.

The editor at a glance

  1. View switcher Top left: overview, view 1, view 2, 3D.
  2. Main bar Top centre, with the zoom pill top right: undo and redo, delete, clone, mirror, flip, rotate; snapshot, settings, shortcuts, close.
  3. Object palette Left rail: favorites, the four smart tools, six object categories.
  4. Layer palette Bottom right, movable; click its header to collapse it.
  5. Smart tools The four green buttons on the left rail, or A, N, T and W on the keyboard.
  6. Freeform tool First tile in the Other category of the object palette.

View switcher: two views, the overview and 3D

Top left: overview, view 1, view 2, 3D.

The joint in 3D

  • Press 3 or click the 3D button: the drawing you already have becomes a 3D section view.
  • Rotate it with the mouse; Front and Angled take you back to a clean pose.
  • The 3D column in the layer palette decides which objects appear; parts with no 3D shape say so.
  • With the 3D engine off in Preferences, the 3D view, the column and the badges all disappear.
3 Show the 3D view
Esc Leave the 3D view

Two views, named after the job

  • Two images per drawing, as before. For a WPS they are called Joint preparation and Pass sequence.
  • Each object has a checkbox per view in the layer palette, so you decide where it shows.
1/2 Show view 1 or view 2
0 Show the overview

Overview

  • Both images side by side, each in the exact frame the export will have.
  • Click a half to zoom in. Edit image jumps into that view, Download saves its PNG.
  • Fit shows both images whole.
0 Show both exported images side by side
Ctrl+0 Fit both images
Esc Leave the overview
The overview with both images of a drawing side by side in Weldia Designer 2

Main bar: settings, mirror, snapshot, zoom

Top centre, with the zoom pill top right: undo and redo, delete, clone, mirror, flip, rotate; snapshot, settings, shortcuts, close.

Settings for this drawing

  • The standard: ISO 2553 or AWS A2.4, for every symbol and dimension in the drawing.
  • The grid scale: 1, 2 or 5 mm under ISO; 1/16, 1/8 or 1/4 in under AWS.
  • The style: default, contrast or black and white.
  • All three are saved with the drawing.
The settings panel in Weldia Designer 2, the group for this drawing

Preferences

  • Your defaults for every new drawing: standard, grid scale, style.
  • Symbolic or measured dimension labels.
  • The 3D engine on or off, and its backdrop.
  • They follow your account, so they are the same on every computer.
The settings panel in Weldia Designer 2, the preferences group

Mirror

  • Mirrors the selection across the vertical zero axis and keeps the original, so a symmetric joint is drawn once.
  • The copies keep their dimensions; mirrored weld passes take the next free numbers.
M Mirror the selected objects
H/V Flip horizontally or vertically, in place
D Clone the selected objects

Snapshot

  • Drag a rectangle over the part of the drawing you need and save it as a PNG.
  • The picture is exactly what the export shows: no handles, no helpers. It works in the 3D view too.
Enter Save the whole drawing (2D views only)
Space+ drag Move the rectangle instead of resizing it
Esc Cancel and leave the tool

Zoom

  • Plus, minus and a 1:1 button back to 100 %. The readout only appears while you are off 100 %.
  • The wheel zooms, and so does a pinch on a tablet. From 75 to 300 %; from 2× the grid draws twice as fine.
+/- Zoom in or out
Ctrl+0 Zoom to 100 %
Space+ drag Pan the canvas (also Shift + drag or the middle button)

Save, undo, export

  • Saved as you work; the cloud icon next to Close shows the state.
  • Undo and redo across everything, dimensions and passes included.
  • The export follows the drawing's style: default, contrast, or black and white for print.
Ctrl+S Save the drawing
Ctrl+Z Undo
Ctrl+YorCtrl+Shift+Z Redo
? Open the list of all shortcuts
The same joint exported in the default, contrast and black-and-white drawing styles

Object palette: parts, welds and tools

Left rail: favorites, the four smart tools, six object categories.

Objects by category

  • Six categories on the rail: plates, tubes and pipes, rods, welds, dimensions and marking, other.
  • Hover a category and click a tile to add it, or drag it to where you want it.
  • Tiles with a 3D shape carry a 3D badge.
The object palette with the plate category open in Weldia Designer 2

Favorites

  • Star a tile and it also shows up in the Favorites panel, the first button on the rail.
  • Pin the panel open and drag a name to reorder. The list follows your account.
Favorites panel in Weldia Designer 2

Snapping

  • Parts snap to the grid and to guides off the edges of other parts. Where two guides cross, you land corner to corner.
  • Hold Ctrl when you want it off.
Ctrl+ drag Drag without snapping
Move by one grid step
Ctrl+ arrows Move by a tiny step

Layer palette: everything in the drawing, in order

Bottom right, movable; click its header to collapse it.

Every object, listed

  • One list of everything in the drawing; the top of the list is drawn on top.
  • Each row has a thumbnail, a lock and a checkbox per view: 1, 2 and 3D.
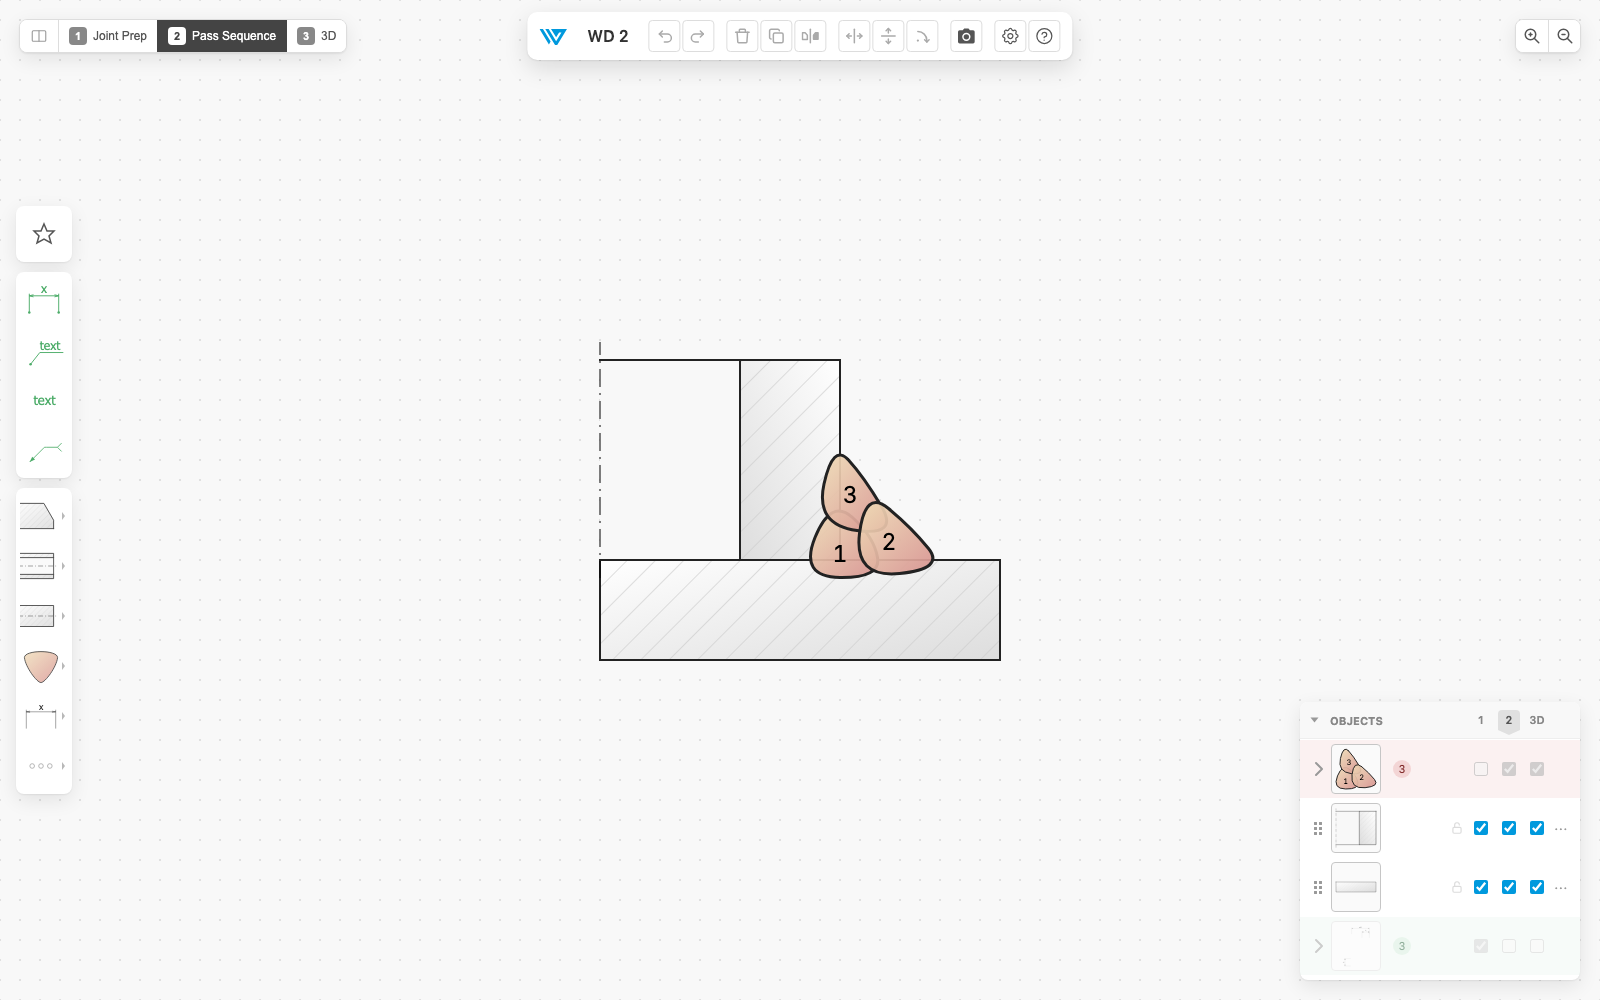
  • Weld passes show their number, so a multi-pass weld reads as a numbered stack.
  • Click the 1, 2 or 3D column header to switch the view.
Layer palette with numbered weld passes in Weldia Designer 2

Lock and hide

  • Lock a finished part: it stays put and out of the selection.
  • Untick a view and the object leaves that image. That is how one drawing shows the joint with and without the passes.

Masking

  • Add a mask from the row's ⋯ menu and outline a polygon over the object. What is inside is hidden.
  • Click the mask thumbnail to edit it, or flip it so only the inside shows.
  • The mask belongs to the object and moves, rotates and flips with it.
Enter Close the outline
Backspace Remove the last point while drawing; the whole mask when editing
Esc Cancel
A polygon mask hiding part of a tube in Weldia Designer 2

Grouping

  • Weld passes that sit together fold into one collapsible group in the list. Markup does the same.
  • Select several objects and move, clone or mirror them as one.
Ctrl+ click Add to the selection, or remove from it
Ctrl+A Select all objects
Esc Deselect

Reordering

  • Drag a row by its grip. Whatever is higher in the list is drawn on top.

Smart tools: the minutes Designer 1 still cost you

The four green buttons on the left rail, or A, N, T and W on the keyboard.

Auto-dimensioning

  • Pick an edge or two and the dimension draws itself.
  • One edge gives a length, two parallel edges a distance, two meeting edges an angle, an arc a radius and a full circle a diameter.
  • Labelled t1, t2 or ⌀D1 the way a WPS does, or with the measured value.
  • Move the plate, open the bevel, mirror the joint: every dimension follows.
A Start auto-dimensioning
Type a value Use the typed text as the next label
Tab Switch symbolic / measured labels
Enter Place the dimension at the pointer
Backspace Erase typed text, then the last pick
Esc Clear typed text, then leave the tool
Dimension tool picking the plate edges for a thickness dimension in Weldia Designer 2

Weld symbol

  • Click where the arrow should point, click again to place the symbol, and the dialog opens.
  • 24 weld types in ISO 2553 and 17 in AWS A2.4. Sizes, contour, modifiers, and a tail with the process and the WPS reference.
  • Every change applies at once; there is no Save button in the dialog.
  • Switch the standard of the drawing and every symbol redraws.
W Start the weld symbol tool
Esc Back one step, then leave
Weld symbol dialog open on a fillet weld symbol in Weldia Designer 2

Ink tool for weld passes

  • Draw each pass with one stroke. It becomes a proper weld pass with the next number.
  • The tool stays armed, so a twelve-pass weld is twelve strokes.
  • It is the last tile in the Weld category and has no key.
Backspace Remove the last pass
Enter/Esc Finish
Weld passes drawn with the ink tool and numbered in Weldia Designer 2

Annotations and balloons

  • Click a weld, an edge or a point, then place the text. The leader ends the way ISO 128-22 wants it.
  • A note on a weld takes the next pass number and follows the weld wherever it goes.
  • Balloons for part references (ISO 6433) number themselves too. Their tile is in Dimensions and marking.
N Start the annotation tool
Start typing Replace the text before the second click
Esc Clear typed text, then the pick, then leave the tool

Text

  • Click for a line of text, drag for a box that wraps.
  • Three sizes, five colours, alignment, and a symbol palette with ⌀ ± ° × and Greek letters.
  • You type straight on the canvas.
T Start the text tool
Esc Cancel editing; click outside to save
Text dialog open on a note under a joint in Weldia Designer 2

Freeform tool: for what no palette has

First tile in the Other category of the object palette.

Shapes, point by point

  • Click the corners and close on the first point. A segment can be straight or an arc.
  • Afterwards every corner is a handle you can move or delete, and every segment can be split, curved, hidden or turned into a break line.
  • Drawn with hatching and outline like any part.
Enter Finish drawing
Backspace/Delete Remove the last point
Esc Finish or cancel
A freeform shape being edited in Weldia Designer 2

Your drawings from Designer 1 are already in Designer 2.

Open Designer Try for free